LAB 01-02 - Sensor Data Visualisation Using X-Cube-Monitor
Goals
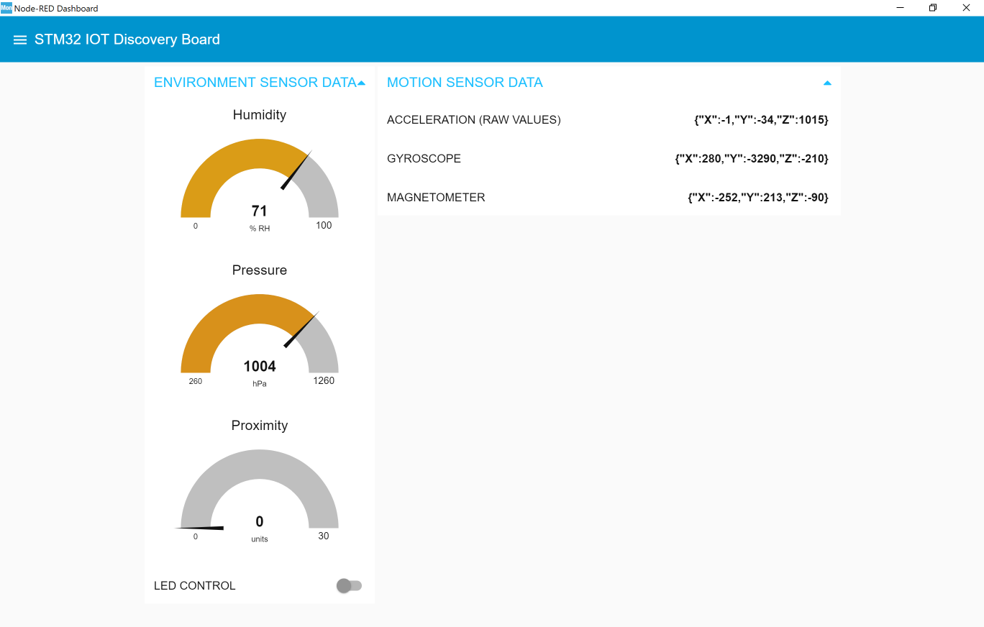
Now let’s create a dashboard using STM32CubeMonitor
Overview
1.In this part we will create a dashboard on our laptop using STM32CubeMonitor.
2.This dashboard will be connected to AWS platform which will feed the data received by our IoT Discovery Kit to the dashboard.
3.In order to do that we need to use a trick (a dummy device) to pass on the information from our device to our dashboard. This is necessary as we need a new binoma (certificate / private key) for the STM32CubeMonitor MQTT client connection with AWS IoT Core

Dummy Thing Creation in AWS IoT Core
Note that below process could be done through AWS CLI using the scripts provided in the workshop package or via. the AWS IoT Core Management Console
1.On AWS IoT core click on Manage –> Things then Create 2.Select Create a single thing 3.Give your thing a name like dummy_thing then click Next 4.Select the first option Create certificate 5.On the next screen download the Certificate and the keys, activate your thing and click on Attach a policy 6.Select your policy to attach and click on Register Thing 7.On the Manage –> Things, your dummy_thing should appear next to your Real thing previously created
Installation of the x-cube-aws-sensor-demo source code
Lab 01 - Preparation: A new demo leveraging on the various sensors present on the board is required for this Lab

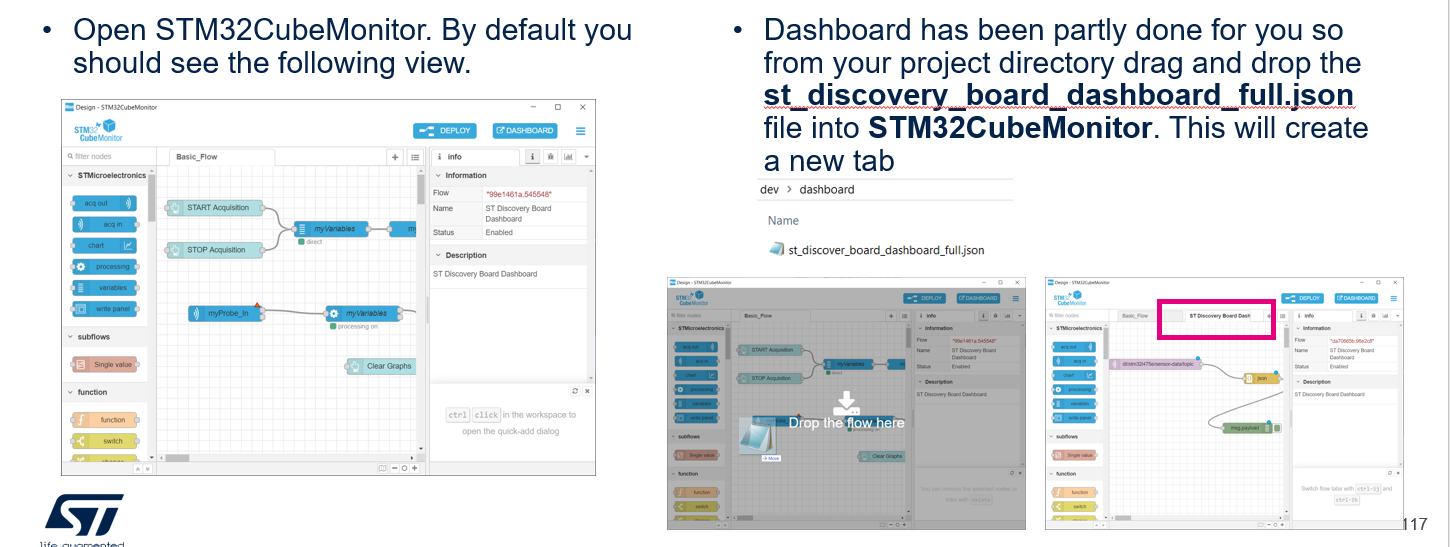
Dashboard Creation
We will be reusing some of the previous step material/results
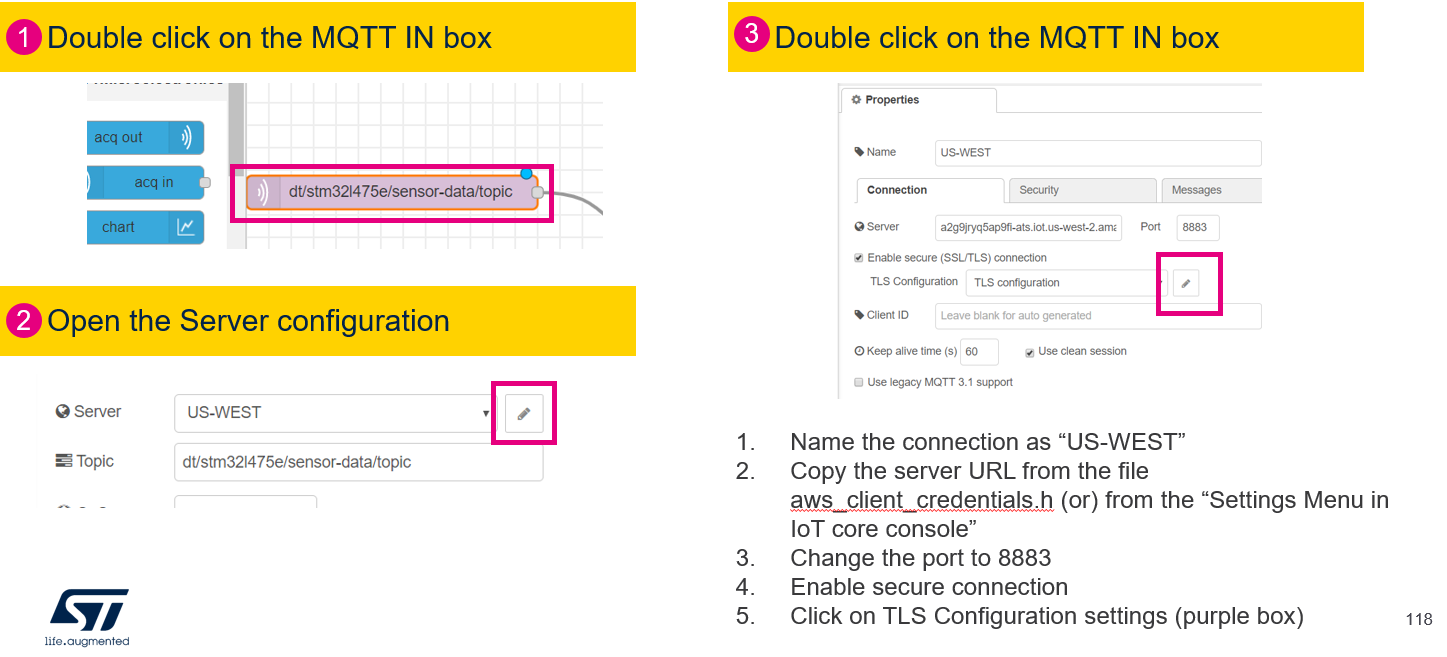
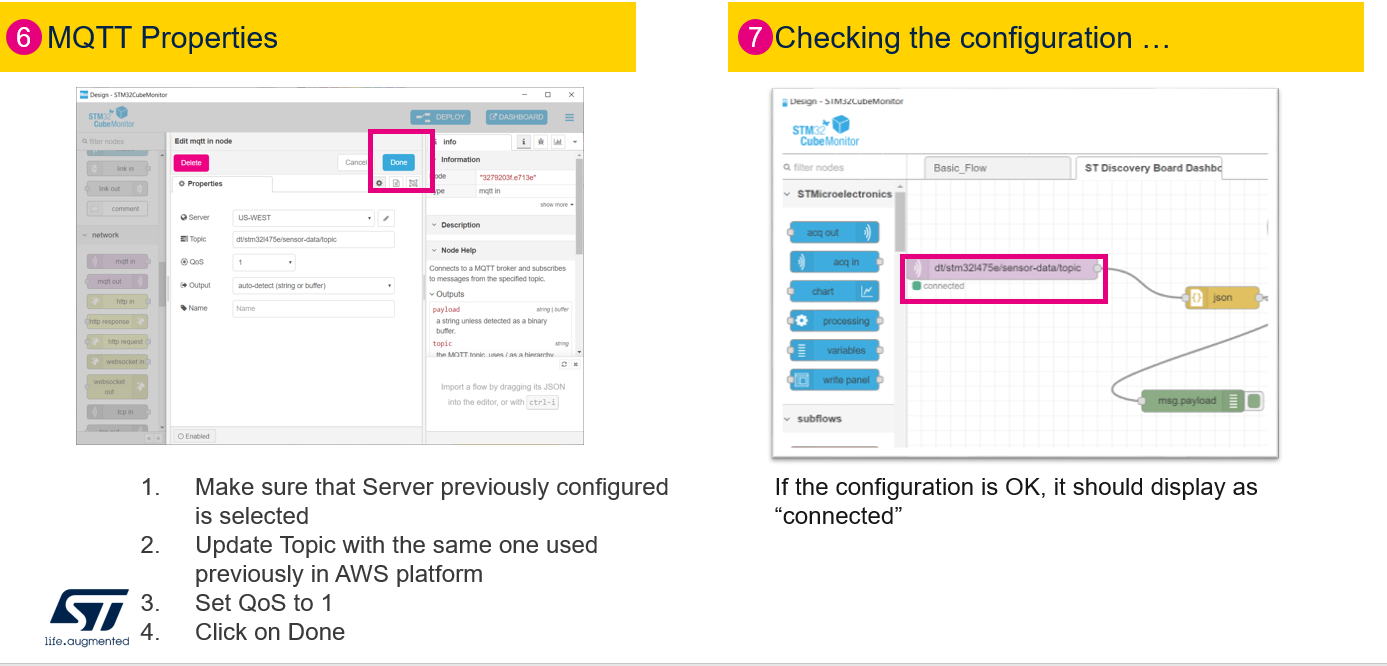
STM32CubeMonitor: Configure MQTT Broker #1
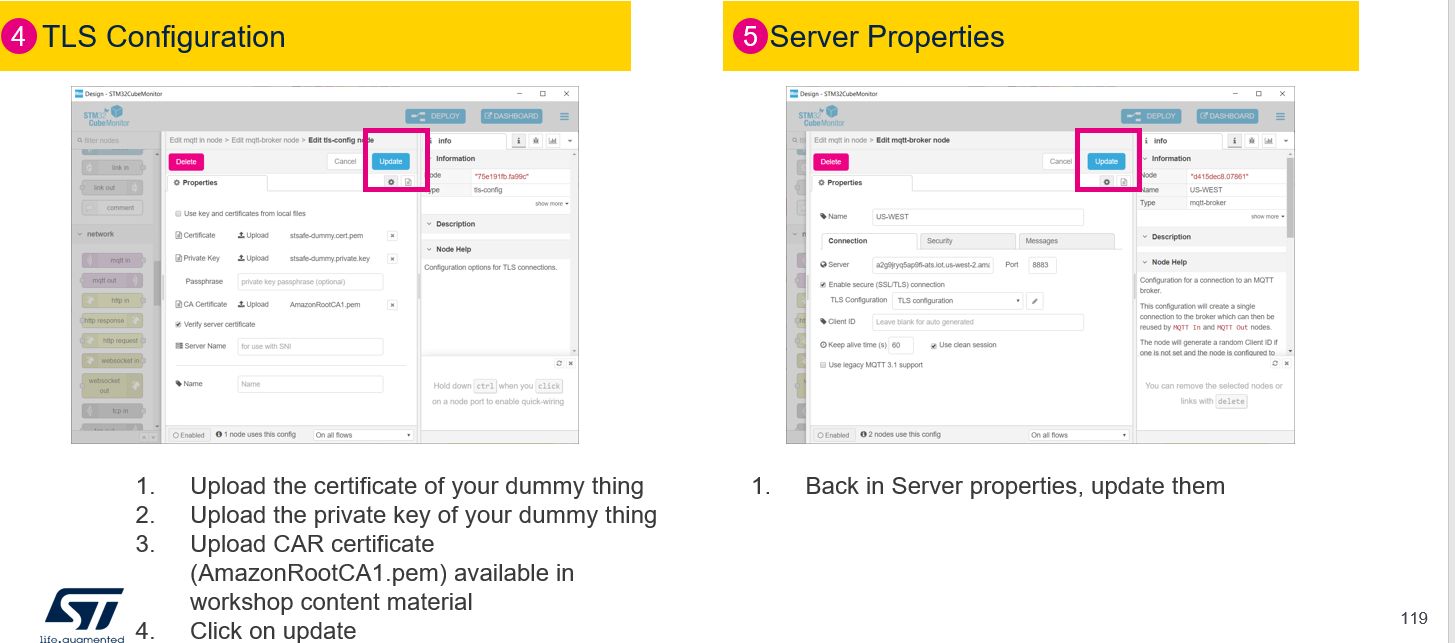
STM32CubeMonitor: Configure MQTT Broker - TLS Configuration & Server Properties
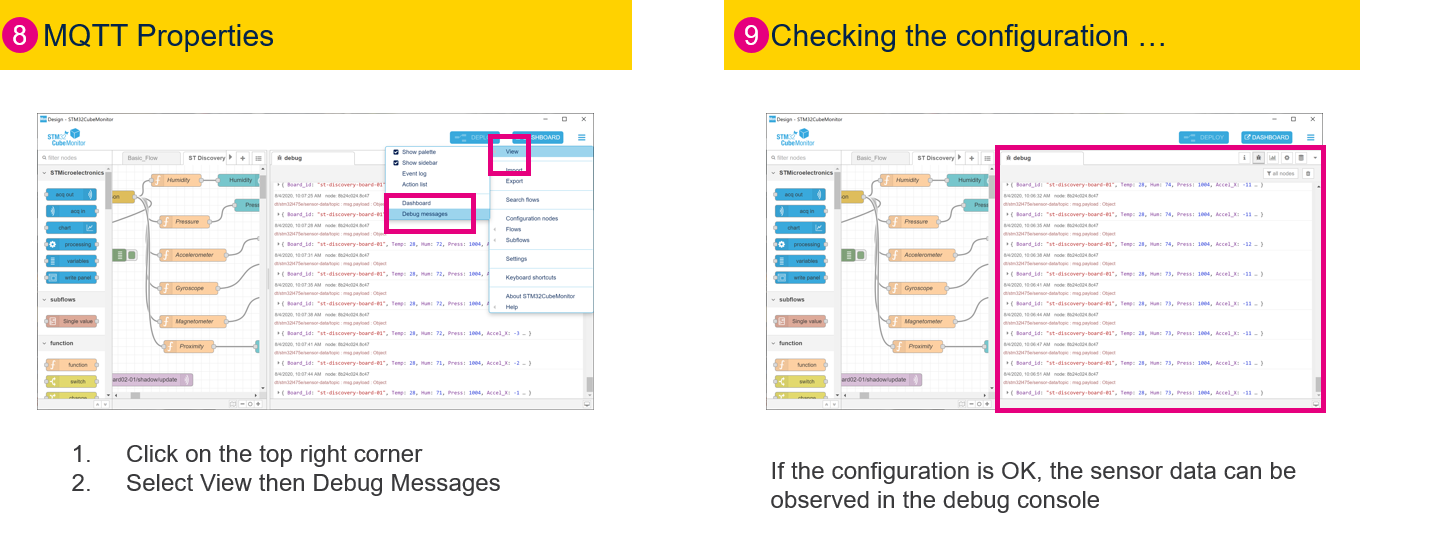
STM32CubeMonitor: Configure MQTT Broker - Verification of the Mqtt Broker Connection
STM32CubeMonitor: Verify whether the STM32-XCube Monitor is able to receive data from the cloud
Launching the Dashboar UI
Launch the Dashboard by clicking on the Dashboard button